If you have just read the Ableton Live or FL Studio and SYQEL guide, this guide will be relatively the same. This guide also goes over how to set up SYQEL and how to be ready to visualize your audio. This guide differs as it shows you how to route audio from Logic Pro. Welcome Logic users! Logic is a Mac-Only software, so Loopback will be necessary to route audio from Logic to SYQEL.
Supplies
You’ll only need a few things.
1) A computer
2) Logic Pro (DAW)
3) Google Chrome and a SYQEL account
4) OBS Screen Recording Software
Step 1: Signing Up for SYQEL

First and foremost, we need to create a SYQEL account.Head over to app.syqel.com to get started and create a free account.
Once you do, you will be greeted with the main page. SYQEL runs off of your browser so you don’t need to download anything.
Step 2: Selecting Your Visual Engine 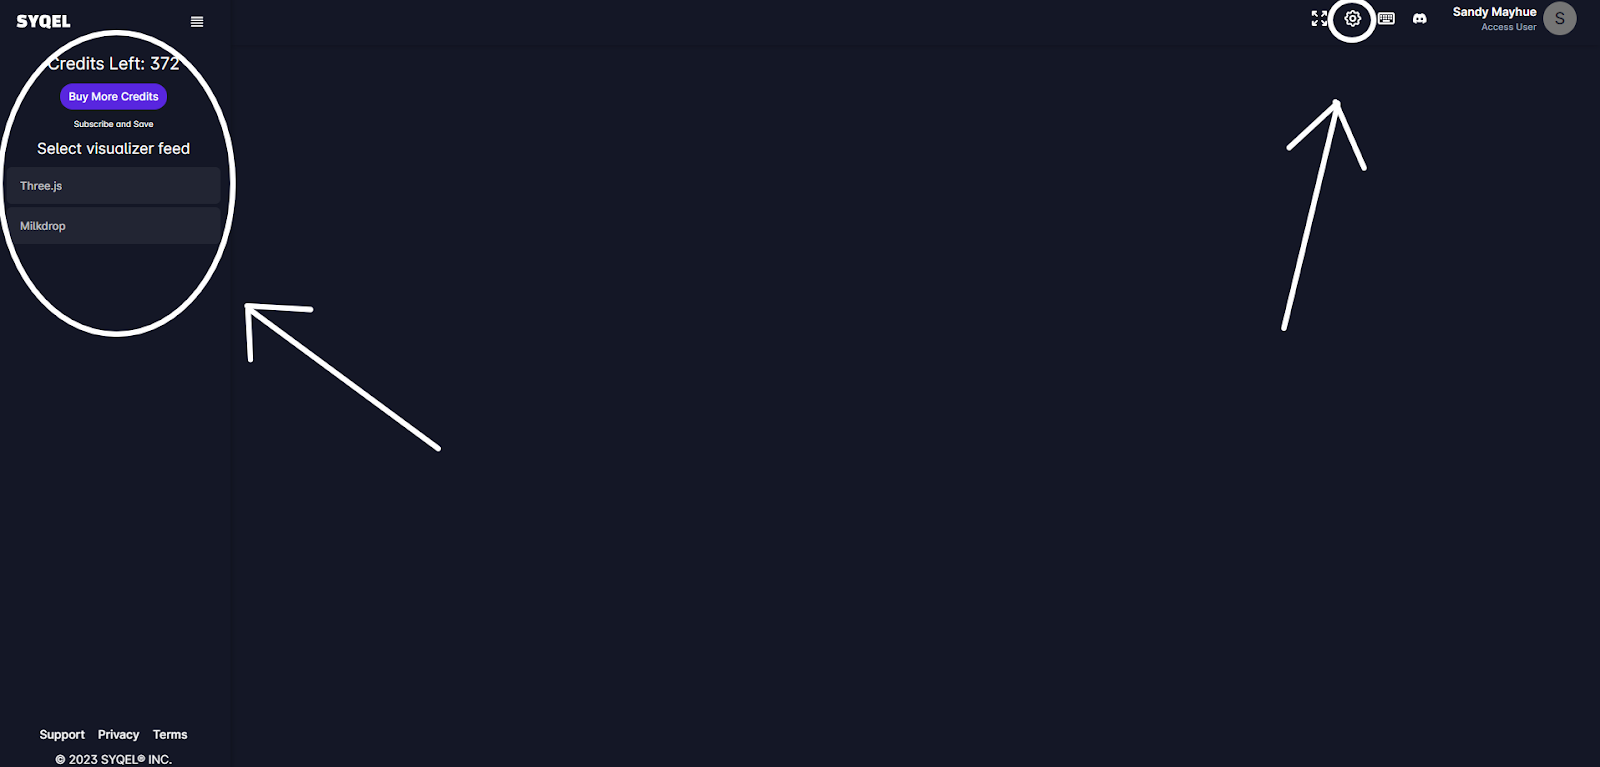
SYQEL offers two different visualizer engines shown on the left-hand menu. The first is Three.js, which allows you to hand-pick pre-made visuals. The second is called Milkdrop, which cycles through hundreds of thousands of visuals automatically.
Today we’ll be using Three.js, so we’ll be able to pick out our visuals.
To do so, click on the settings button in the top right menu.
Step 3: Picking Out Your Visuals

Once you click on the settings icon, you’ll be greeted with the settings page.
This is where you can create a new visual playlist.
1: Name a playlist or select an existing one.
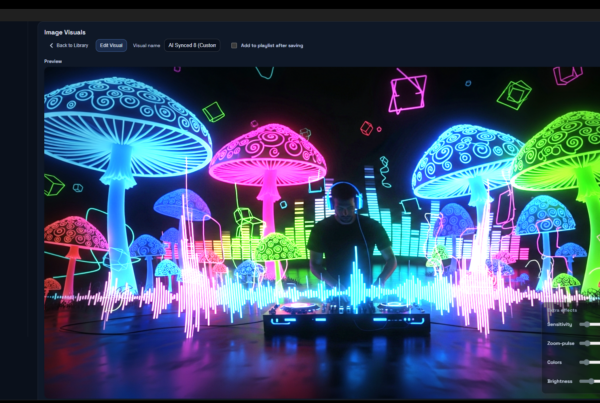
2: Then, click on available visuals. Here you can scroll and see all the pre-made visuals you can use in your playlist.
3: When hovering over a visual it will animate to your microphone input.
4: Once you find a visual you like, simply click on it and it will automatically be added to your playlist.
Playlists automatically save any changes you make!

5. Next, head over to the selected visuals tab.

6. Here you can remove any visuals by clicking the small “x” on the top left of each visual or click and drag your visuals into whatever order you would like them displayed.
Step 4: Upload Your Watermarks

Next, head over to the watermarks section of the settings page.
1: You can upload up to 9 watermarks.
2: Choose their size and positioning.
3: Don’t forget to save your watermark settings at the bottom of the page!
You will be able to cycle through these once you have your visualizer started, so you don’t have to stop the visualizer to switch through your watermarks.
Step 5: Setting Up Frequency Reactiveness

This is an optional step!
If you would like to create different frequency reactiveness templates, for different styles of music, this is a very powerful tool to use!
To start click on the frequency reactiveness section of the settings page
This will determine how your visualizer reacts to the audio. If you only want the kick and bass to affect your visuals, you can set that here. You can save your settings as an audio preset, which we can then choose when we set up our visualizer engine.
Step 6: Setting Your Visualizer’s Behavior
Click on the visualizer behavior section of the settings page. You will see three options.

1: The framerate of your visuals. You can set this up to 244 frames per second.
2: How many seconds each visual lasts on screen before it cycles to the next visual in your playlist.
3: How long the transition is to each visual.
Make sure you save your settings at the bottom!
Step 7: Setting Up Your Visual Engine

Now you’ve created your first playlist and set your visuals frequency reactiveness and behavior. Our visuals are ready to go, we just need to set up our visualizer engine.
First, let’s click on Three.js in the left-hand menu of SYQEL. You will then see 3 drop-down menus appear.
1: First is your audio input which we will go over in the next step.
2: Second, you have your playlist selection.
3: Third, your audio preset selection
Let’s go over how to set up SYQEL to receive audio from Logic Pro.
Step 8: Routing Logic Pro’s Audio to SYQEL 
There are a few ways to route Logic’s audio to SYQEL. We are going to be using a program called “Loopback” which allows you to route your Logic’s core audio to SYQEL.
Let’s go over how to set up Logic’s preferences.
Download Loopback Here: https://rogueamoeba.com/loopback/
Step 9: Setting Logic’s Audio Preferences
1:In Logic Pro, choose Logic Pro > Settings, or press Command-Comma (,).

2: You will be greeted with the preference page for Logic Pro. Head to the “devices” section of this menu.
3: You’ll want to make sure that “core audio” is selected. This allows us to use loopback audio. Let’s go over how to set that up
Step 10: Setting Your Audio Source 
Loopback allows you to record and route your desktop audio. We will need this to route audio from Logic Pro to SYQEL.
1: Create a new audio source with Loopback.
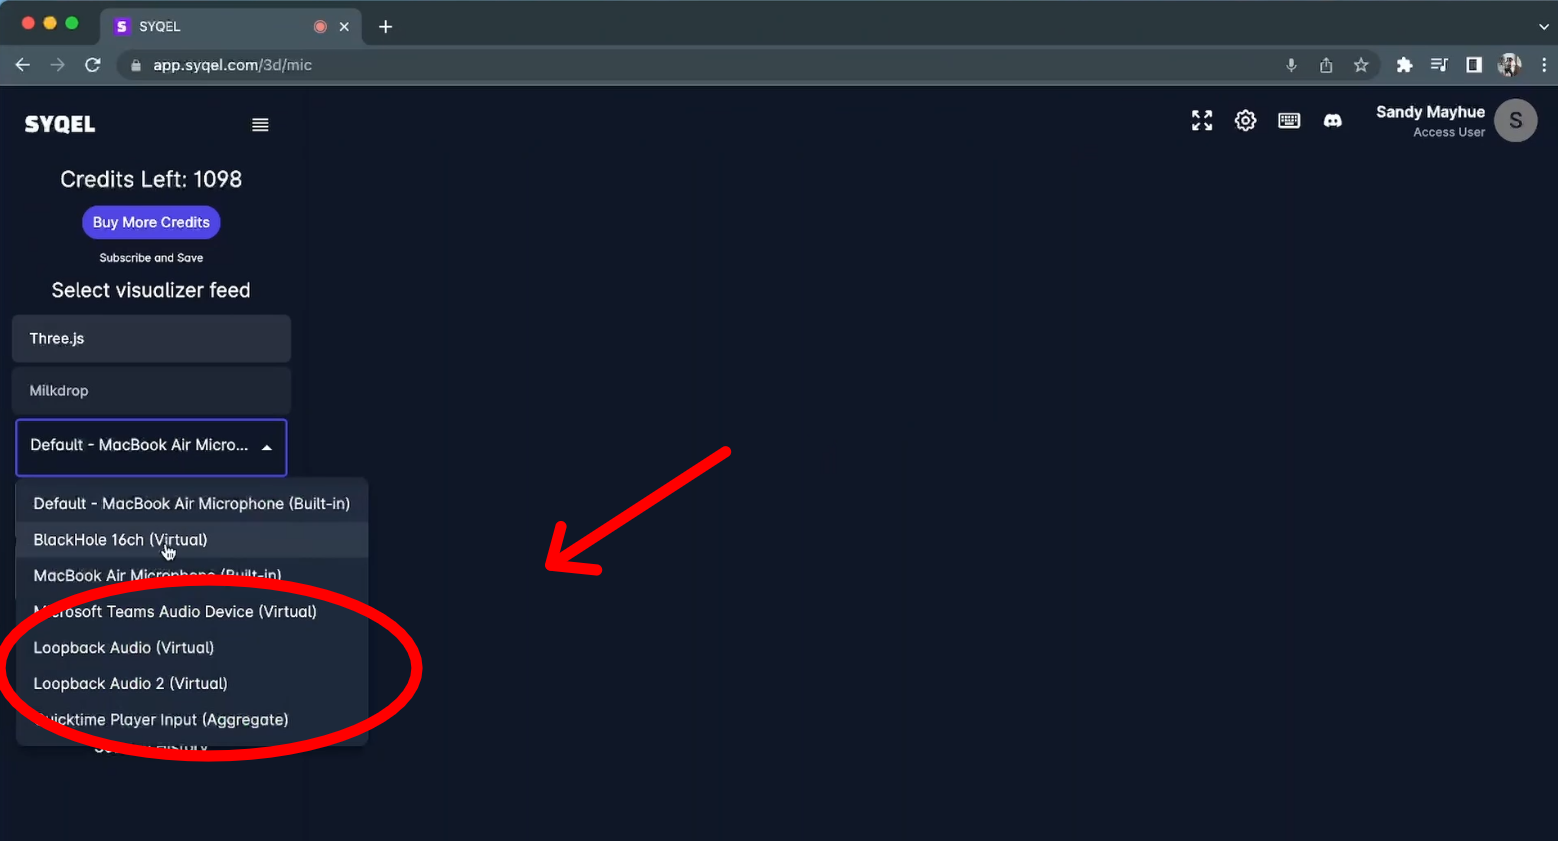
2: In Logic, make sure you have your core audio selected and your output set to your Loopback source.
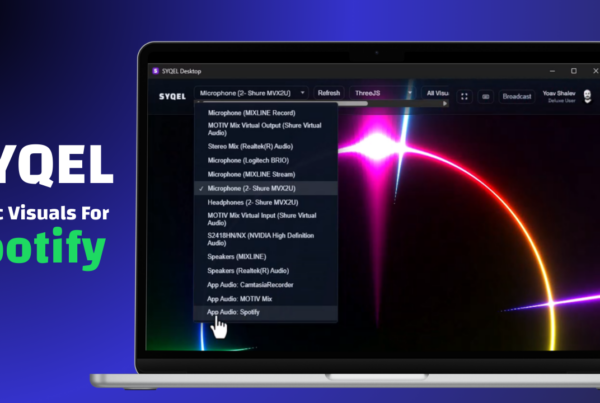
3: Then, in SYQEL, select your audio output as your Loopback Audio.
We are ready to start creating visualized music videos directly from Logic Pro!
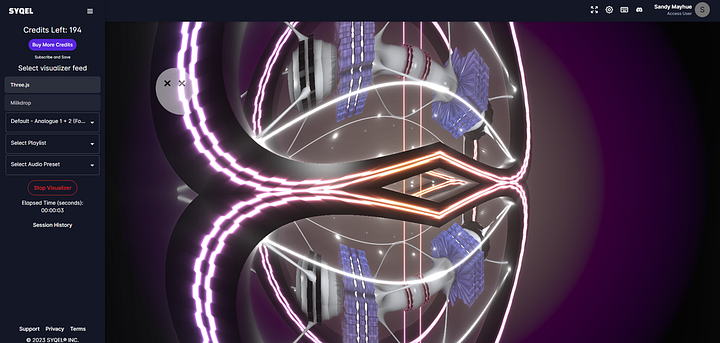
Step 11: Start Your Visualizer
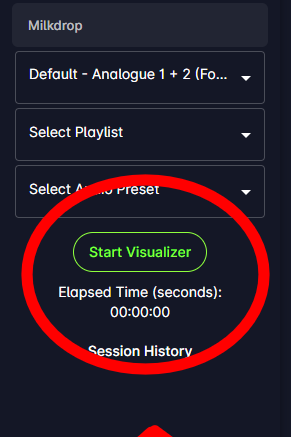
Once you have all three of your parameters selected, hit the Start Visualizer button to immediately begin the visualization.
The visualizer will start reacting to your audio as soon as any audio is playing in Logic. Simply hit Stop Visualizer to stop the visualization.
Let’s go over how to record your visuals via OBS.
Step 12: Recording SYQEL With OBS

I recommend using OBS to record SYQEL.Download HERE. It’s super easy to set up.
1:Launch OBS and create a new window capture source.
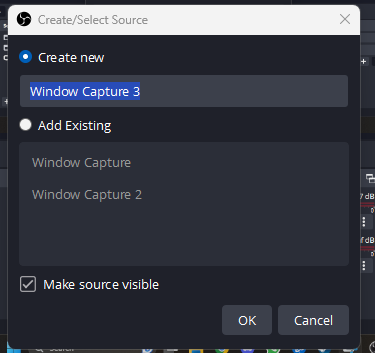
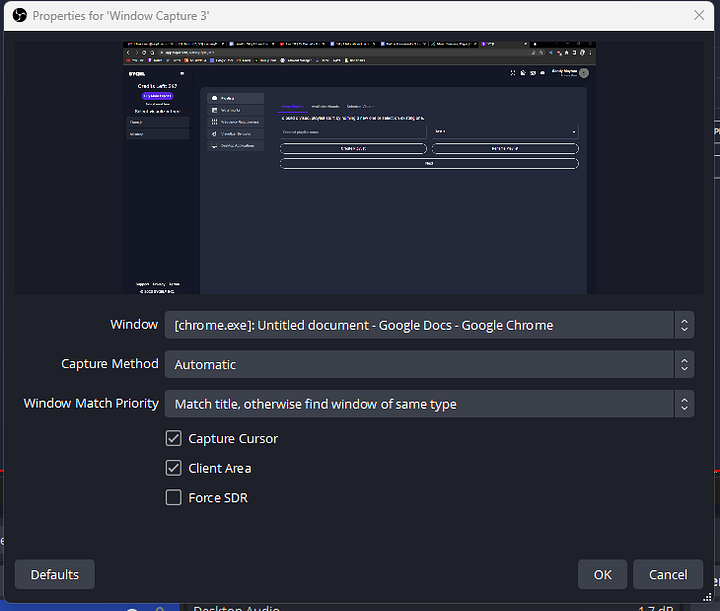
2: Select Window Capture
3: Have Google Chrome be the source! You should see SYQEL in your new window source.
Step 13: Start Your Visualizer

Once you have all three of your parameters selected, hit the Start Visualizer button to immediately begin the visualization.
The visualizer will start reacting to your audio as soon as any audio is playing in FL Studio. Simply hit Stop Visualizer to stop the visualization.

Let’s go over how to record your visuals via OBS.
Step 14: Record Your Video

Now, with Audio coming from Logic Pro, your visual started, and OBS recording SYQEL, we can hit the Start Recording button in OBS! Your audio source in OBS should be the same as the audio source in SYQEL. So now you’re recording your music and your visuals with no latency.
Step 15: Customizing Your Visual As It’s Recording
Finally, if you want to cycle to the next visual, change watermarks, or disable your watermarks while you are recording, you can do so with the help of hotkeys!
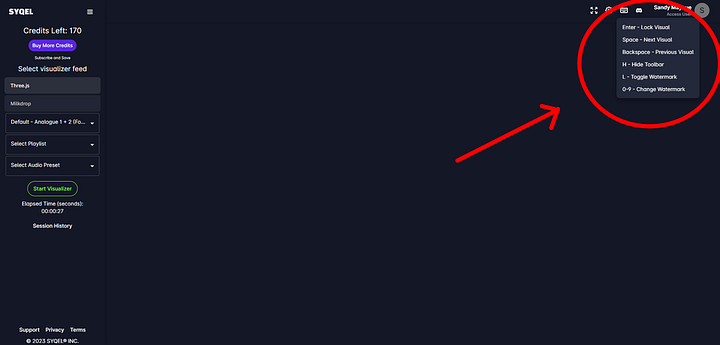
1: “Enter” will lock a visual in place, so it will not cycle to the next one in your playlist.
2: “Spacebar” will cycle to your next visual in your playlist.
3: “Backspace” will cycle to your previous visual in your playlist.
4: “h” as we described earlier, will toggle the toolbar at the top on or off.
5: “L” will toggle your watermarks on or off.
6: “0–9” will cycle through your uploaded watermarks.
Step 16: Finished!
There you have it!
A complete guide for recording visualized music videos, directly from Logic Pro.
Happy creating!
For a more in depth tutorial using SYQEL, check out the complete guide HERE.